
Just a minor update as little has been done on the boat this year. The new (to me) house is demanding a lot of time and little is left over for Jenny.
Projects I am working on are the replacement of the Marelon seacocks with proper bronze seacocks. This job is nearly done but the replacement seacocks do not have the same dimensions which is requiring some rework to make them all fit. One of my cockpit drains just will not line up with the drain underneath and I am about halfway through moving the cockpit drain fitting about an inch over. It won't be perfectly symmetrical with the other drain but the alternative seems to be more work than it is worth. Particularly when it is so hard to get anything accomplished around the house repairs and I don't want to add anything I don't need to to the to-do list.
I am also routing the deck drains out of the cockpit well and into their own hull thru-hulls. I just wasn't happy with the decks draining into the cockpit and with the other rework going on it seemed a good time to rectify that.
Honestly, it isn't much fun to document a job that I have already done once so no new pictures at the moment.
Otherwise, I try to hit the odd nagging issue that doesn't require too much surgery but isn't really noteworthy enough for the blog.
Em tasol wantoks
Sunday, August 20, 2017
Sunday, October 23, 2016
Not Dead
I am not dead and the Jenny did not sink.
This spring, my girlfriend and I bought an old house with enough land to bring Jenny home which is where all the tools and materials are. The logistics were becoming increasingly difficult as the project focus changed from basic fiberglass and rough structural work to the finish details. When I went to the boatyard to work on the hull all my tools fit in one bag. As the project progressed this was no longer the case.
The old house needs tons of work and will be a decade or two project. Come to think of it, the boat has become a decade project too hmmm... Anyway... The house had some priority work that needed to be done and then there is all the settling in and stuff and Jenny just had to wait. Now I have to schedule fixing the house, building a workshop and getting back to work on the boat. I really need to quit my day job...
I left off with the seacock replacement project. The head and sink are complete. The raw water intake for the engine will need some modifications because the replacement hardware is a bit larger than the original. The cockpit drains will need a lot of rework for the same problem.
Today, I started a list and spent some time remembering where I left off.

Monday, May 25, 2015
Remembering I have a boat on Memorial Day
Did someone say I have a boat? I seem to have some distant memory of something like that. Only I don't remember owning a boat. I remember a boat owning me but maybe that is just semantics.
Well, it is Memorial Day and the weather has dried up and become warm. Two weeks ago I did some spring cleaning. If I leave the boat alone too long the mold comes back. I blame the bamboo flooring. In hindsight that was a bad idea. It looks nice but I haven't met anyone that has used it that didn't wind up with a mold problem. Something about mold in the bamboo fibers. I am putting a rug down for now but long term I will probably have to epoxy seal it and put a plywood veneer over the whole thing. I guess an inch and a half of cabin sole thickness wasn't enough.
About $850 worth of 'seacock' parts arrived this week.
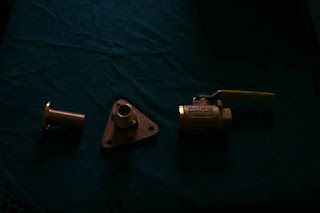
Not a true seacock but I know people that have had good luck with these. The thru hull threads into a flange (middle) with normal threads and the top of the flange has pipe threads to accept a typical ball valve. Future maintenance should be much easier. The part that fails is the valve and it just threads off. I don't expect more maintenance however. I have gone with the traditional all bronze components - no more awful Marelon - so I expect to retire with these fittings. If the ball valves do seize up they should be easy to replace.
I ordered six of these - three in 3/4 inch size and 3 in 1.5 inch. My plan last year was to add two for the deck drains but that is going to take more planning and not a high priority so for now I am going to continue letting the deck drain into the cockpit. I am not terribly happy with my initial decision to go that route. I find on sloppy days the bow scoops up a lot of water and sends it aft where it winds up in the cockpit, soaking the feet of my unsuspecting friends. Its a little funny when they panic and think the boat is sinking but it also gets annoying after the first few times. Another solution might be to cut a slot in the toerail with something on the deck to direct the water through the slot. Those two inch toe rails definitely contribute to the volume of water sent aft and if I could redirect it before it gets to the drains I might be okay. A plan for another day.
Today, I measured the thru hulls for length but found I couldn't do a decent job of cutting them on the tailgate of the pickup. The old bolt holes have been cleaned and filled. I decided to continue with my original plywood backing blocks. I would never use plywood again but they are glued in solid and they are doing their job so I didn't feel like starting a fresh fight with them.
Next week I should be installing the assemblies and hopefully I won't have any significant problem lining up with the existing plumbing. Hopefully...
Sunday, November 30, 2014
The summer that didn't happen...
The season came and went but nothing much was accomplished on Jenny all year which is why there hasn't been a blog update in forever.

Between financial setbacks, family issues and health issues every weekend this year was either a wash or severely impaired.
I am not too happy about it but that is what happened. I can tell Jenny is not happy either.
So now I think the plan is to keep Jenny on the hard again next year and do next summer what I had planned on doing this summer. Getting a summer mooring rental agreement with a decent price increase helped me make that decision a few weeks ago. I like cruising more than day sails anyway and I don't have the ability to go on a cruise right now. Maybe in a few years.
Jenny is back snug under her standard winter cover. Nothing much to show there. This year I have even less room at the boatyard and there is even more mud on the ground than before. There is a good chance this is my last year at my current location. I know I was spoiled before but this place is not working out and it is time to move on.
Anyway, just a boring update but boring is better than dead I guess.
Happy Holidays everyone and here is hoping for a more productive season next year :)
Saturday, June 28, 2014
Marelon Seacocks suck monkey balls and Spring Varnishing is boring
Nope, not forgotten but the work on Jenny has been pretty boring (lots of varnishing) which isn't very interesting to write (or read) about.
First of all, Forespar Marelon Seacocks... they suck.
I started this boat project as a wet behind the ears newbie-don't-know-nothing sort of person. At that time I was looking at the old corroded seacocks in the boat (though few and far between - straight tubes abounded) and saw the new, modern, can't corrode Forespar Marelon seacocks and thought that was my answer. As it was a safety issue, installing new seacocks in the under water holes in the hull was an early priority. I think I installed about $1,000 worth of Marelon seacocks in the boat. After the first season they started to feel stiff so I contacted Forespar technical support for recomendations for maintaining the seacocks. I was told, any lubricant other than aerosol (the propellent swells the material) and rinse them out every season. Fair enough. By the end of the second season I was getting worried. Towards the end of the third season my girlfriend shut off the head intake as we were going home and mentioned the seacock felt 'funny'. I checked it and found the handle had sheared off the ball. Luckily this was on an intake which was broken in the closed position so I was able to carry a bucket in the boat and draw from inside and continue with a semi-working toilet until haulout.
I am not interested in having more failures of seacocks so I have removed all my seacocks.
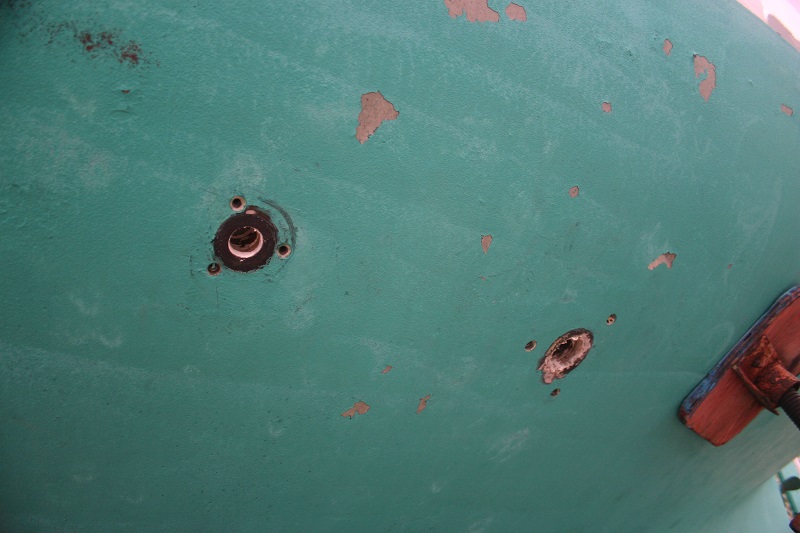

Luckily I chose not to install these with 5200 as others had suggested and the 4200, which was holding fine, gave up its hold without resorting to the nuclear option. I did have to hand chisel off the plastic mushroom heads which was a painful job but only took a few hours.
As you see, the balls were well lubricated at removal.
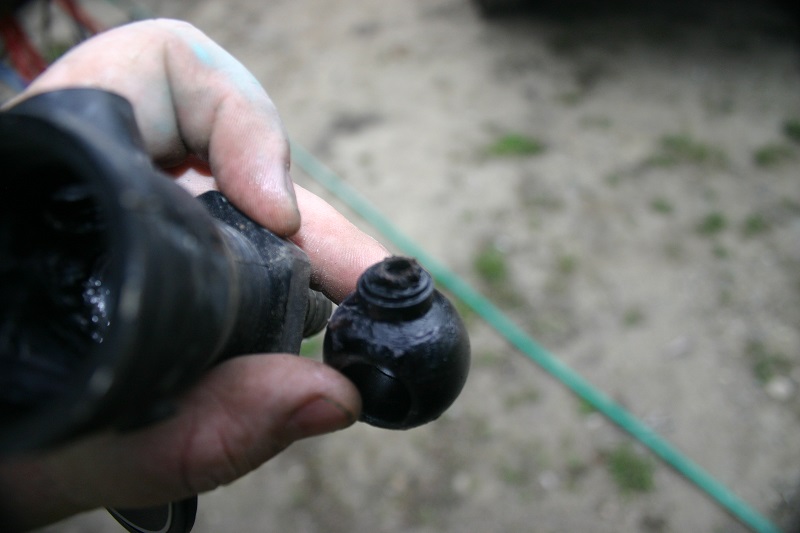
There were all rather stiff. Even though they were very greasy there was a lot of grit around the ball.


The balls were all heavily scored. If they were metal I could polish them. I am not sure what I am supposed to do with Marelon to make them smooth again.
In any case, when the ball gets stiff, the weak point in in the connection between the ball and handle. There is a square section that the handle is slotted on. The picture shows a 1.5" seacock. The 3/4" seacock is much smaller and that is what my girlfriend pealed off. I don't blame her, the plastic is rather soft and easy to distort. The handle itself is rather weak and I can severely distort the handle if I wanted to.
So in the end, a little grit gets into the ball cavity (dirty ocean?...) causing the ball to get stiff and then the connection snaps with hardly any effort. 3 years of summer use before failure. Bronze has been king for a few centuries and I should have stuck with the proven material. Next time I will let someone else try out the new fangled stuff. End of story, Marelon seacocks suck and I wasted a lot of time and money on them. Bronze is good.
So I have plans to replace the seacocks soon but I have a few other non boat expenses coming up and a full set of seacocks is going to set me back some so I have been procrastinating. Luckily it has been good varnishing weather, and that is cheap, so that is where I have been spending my time.
First of all, I upgraded my ladder to something more substantial. I was having fun going up and down on a ladder that was flush with the deck but I know that sooner or later I am going to dance my way off while having a toolbag in each hand so I purchased a 12 foot ladder.
Now I can climb up and down safely and I have a second ladder to use as a poor man's staging for work at deck level.
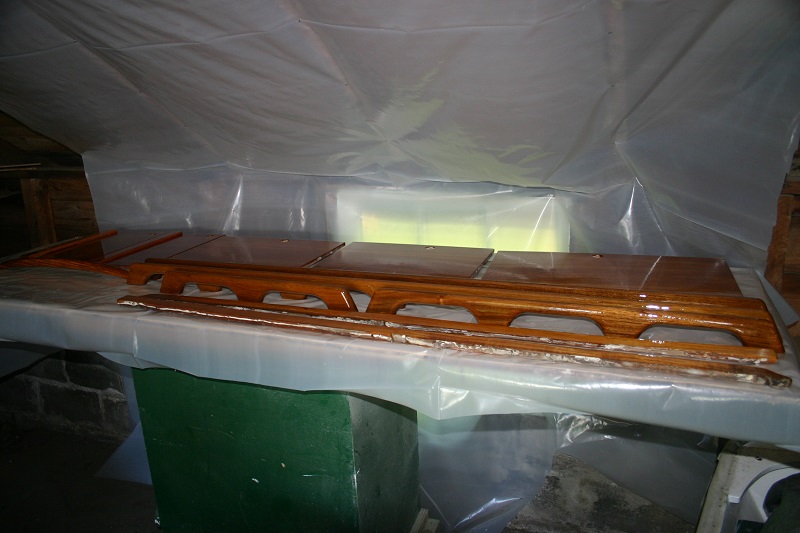
For the past month, every saturday and sunday morning I am varnishing. It is boring but with widespread failure starting it has to be done. If you want the varnish you need covered storage, preferably indoor and heated and really preferable would be to hire a varnishing crew every season to do it for you...
Not much to say there. Sand off, brush on... My winch blocks are near the end of their life. 50 years is about it I guess...

I managed to install the panels that go behind the galley which will allow some fun projects to move forward there.
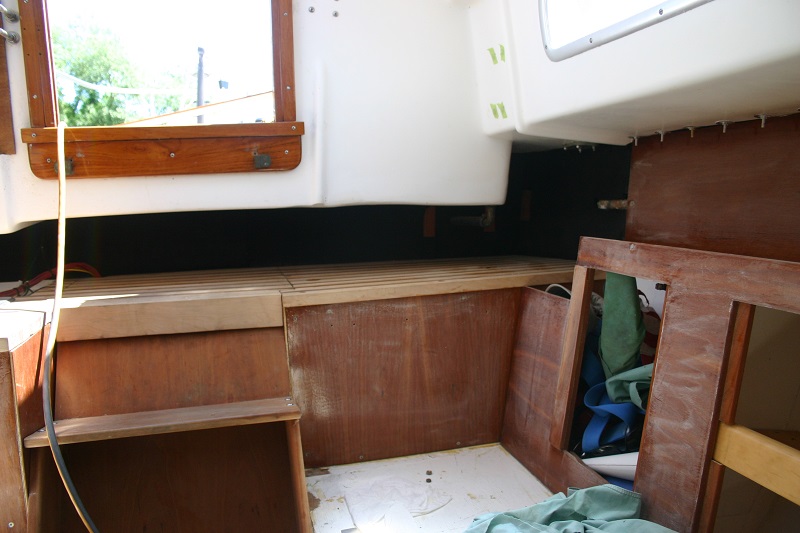


 As you can see the interior is sanded and ready for a final coat (or two) of the satin finish. That will probably happen this weekend or over the July 4th extended weekend.
Other minor projects included some electrical connectors which will allow me to remove the engine electrical box completely without having to disconnect every wire leading in to it. The box covers hardware that secures the starboard cockpit coaming so removal will always be something I need to do from time to time.
I am also ordering some deck navigation lights to be installed this summer and the propane tank and installation bits to finalize last year's stove project. There there is the big electrical project which is mostly just a project on paper at this point.
And that is where it stands.
Think of me slaving to the varnishing Gods while you are enjoying this fantastic last spring early summer sailing weather in New England...
First of all, Forespar Marelon Seacocks... they suck.
I started this boat project as a wet behind the ears newbie-don't-know-nothing sort of person. At that time I was looking at the old corroded seacocks in the boat (though few and far between - straight tubes abounded) and saw the new, modern, can't corrode Forespar Marelon seacocks and thought that was my answer. As it was a safety issue, installing new seacocks in the under water holes in the hull was an early priority. I think I installed about $1,000 worth of Marelon seacocks in the boat. After the first season they started to feel stiff so I contacted Forespar technical support for recomendations for maintaining the seacocks. I was told, any lubricant other than aerosol (the propellent swells the material) and rinse them out every season. Fair enough. By the end of the second season I was getting worried. Towards the end of the third season my girlfriend shut off the head intake as we were going home and mentioned the seacock felt 'funny'. I checked it and found the handle had sheared off the ball. Luckily this was on an intake which was broken in the closed position so I was able to carry a bucket in the boat and draw from inside and continue with a semi-working toilet until haulout.
I am not interested in having more failures of seacocks so I have removed all my seacocks.
Luckily I chose not to install these with 5200 as others had suggested and the 4200, which was holding fine, gave up its hold without resorting to the nuclear option. I did have to hand chisel off the plastic mushroom heads which was a painful job but only took a few hours.
As you see, the balls were well lubricated at removal.
There were all rather stiff. Even though they were very greasy there was a lot of grit around the ball.
The balls were all heavily scored. If they were metal I could polish them. I am not sure what I am supposed to do with Marelon to make them smooth again.
In any case, when the ball gets stiff, the weak point in in the connection between the ball and handle. There is a square section that the handle is slotted on. The picture shows a 1.5" seacock. The 3/4" seacock is much smaller and that is what my girlfriend pealed off. I don't blame her, the plastic is rather soft and easy to distort. The handle itself is rather weak and I can severely distort the handle if I wanted to.
So in the end, a little grit gets into the ball cavity (dirty ocean?...) causing the ball to get stiff and then the connection snaps with hardly any effort. 3 years of summer use before failure. Bronze has been king for a few centuries and I should have stuck with the proven material. Next time I will let someone else try out the new fangled stuff. End of story, Marelon seacocks suck and I wasted a lot of time and money on them. Bronze is good.
So I have plans to replace the seacocks soon but I have a few other non boat expenses coming up and a full set of seacocks is going to set me back some so I have been procrastinating. Luckily it has been good varnishing weather, and that is cheap, so that is where I have been spending my time.
First of all, I upgraded my ladder to something more substantial. I was having fun going up and down on a ladder that was flush with the deck but I know that sooner or later I am going to dance my way off while having a toolbag in each hand so I purchased a 12 foot ladder.
Thank you Google for displaying this image sideways... 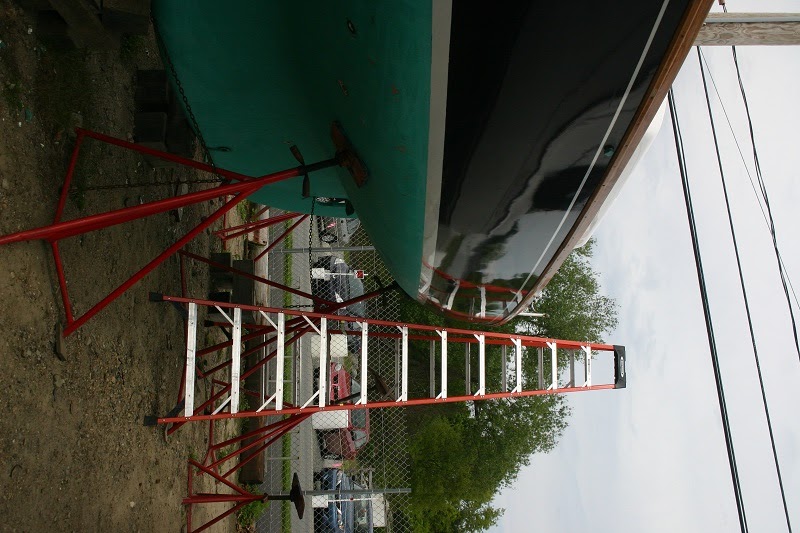
Now I can climb up and down safely and I have a second ladder to use as a poor man's staging for work at deck level.
For the past month, every saturday and sunday morning I am varnishing. It is boring but with widespread failure starting it has to be done. If you want the varnish you need covered storage, preferably indoor and heated and really preferable would be to hire a varnishing crew every season to do it for you...
Not much to say there. Sand off, brush on... My winch blocks are near the end of their life. 50 years is about it I guess...
I managed to install the panels that go behind the galley which will allow some fun projects to move forward there.
Other minor projects included some electrical connectors which will allow me to remove the engine electrical box completely without having to disconnect every wire leading in to it. The box covers hardware that secures the starboard cockpit coaming so removal will always be something I need to do from time to time.
I am also ordering some deck navigation lights to be installed this summer and the propane tank and installation bits to finalize last year's stove project. There there is the big electrical project which is mostly just a project on paper at this point.
And that is where it stands.
Think of me slaving to the varnishing Gods while you are enjoying this fantastic last spring early summer sailing weather in New England...
Sunday, May 18, 2014
Spring Cleaning.
No. I am not dead and Jenny is not a rotting hulk in someone's backyard these days. It was a long winter.

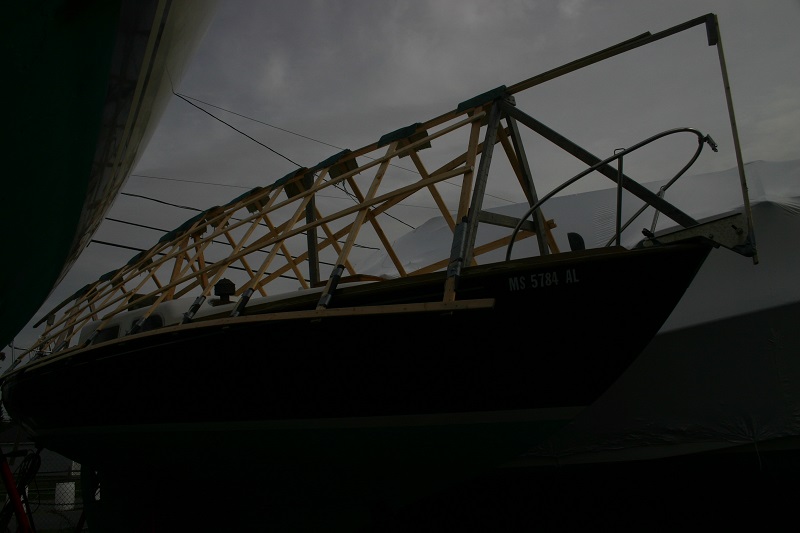
There she is poking her bow out among a bunch of ugly ... things... I don't think Jenny is very happy with me at the moment.
Thankfully, the winter cover held up just fine and two weeks ago it looked just like I left it in October. I checked on it every week or two but with 3-4 foot snow drifts around the boat at all times I didn't get too close. The spring has been cold and wet and with Jenny not going in this year I have been spending time around the house. So far I have delivered five pickup loads to the dump. Most of that stuff is leftovers from boat projects and previous year's winter covers so I guess in a way I have been busy working on the boat...
Jenny is in the middle of a mash of boats and with the mud finally drying out and boat owners behind me anxious to launch I figured last week it was time to take down the winter cover. If you remember, I mentioned that the winter cover went up during a rainy weekend and the boat was absolutely filthy when the cover was complete. Well, the dirt was still there so last weekend was take down the cover and clean, clean, clean...
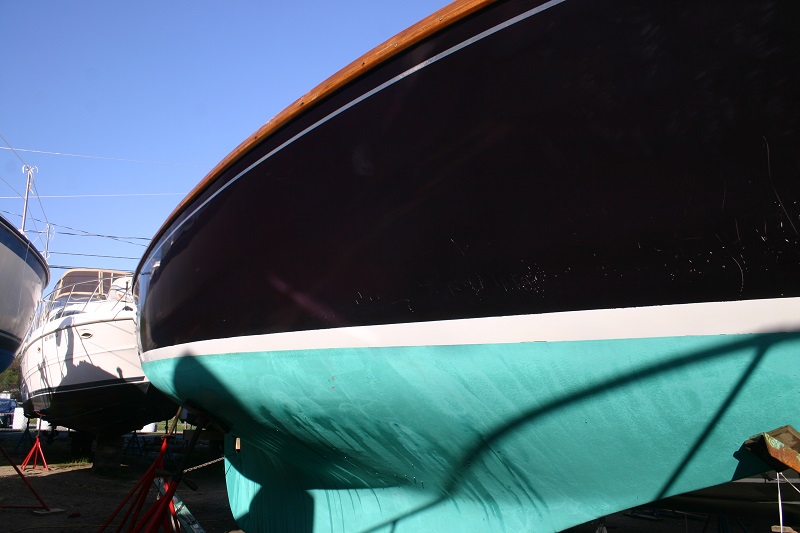
While washing the hull I could see many more indications that other boats have been rubbing up alongside Jenny. They left their wax and gelcoat smeared across the topsides. Some cleaning and rubbing took care of most of it. The rest will be fixed when I re-paint...
Because I was in such a rush to get the boat covered up last fall,the interior was never cleaned up and it was quite messy inside as well. This weekend I have been cleaning again trying to make amends for my lack of attention. Last fall on the trip home I became aware of a mold problem. Over the winter the problem didn't resolve itself so today I was crawling around inside all the storage areas spraying a bleach mix and hosing everything possible out. I took a big bite out of the mold but I have a feeling I will be fighting it for a while. There are a lot of nooks and crannies inside and I have jammed a lot into those nooks. When I built the interior bits I always had in mind that water will get in and it needs to flow out somehow. This was helpful when I decided to bring my hose inside and just open up inside some of the storage lockers. After that it was back to hands and knees and a squirt bottle with paper towels. Owning boats is SO much fun sometimes.
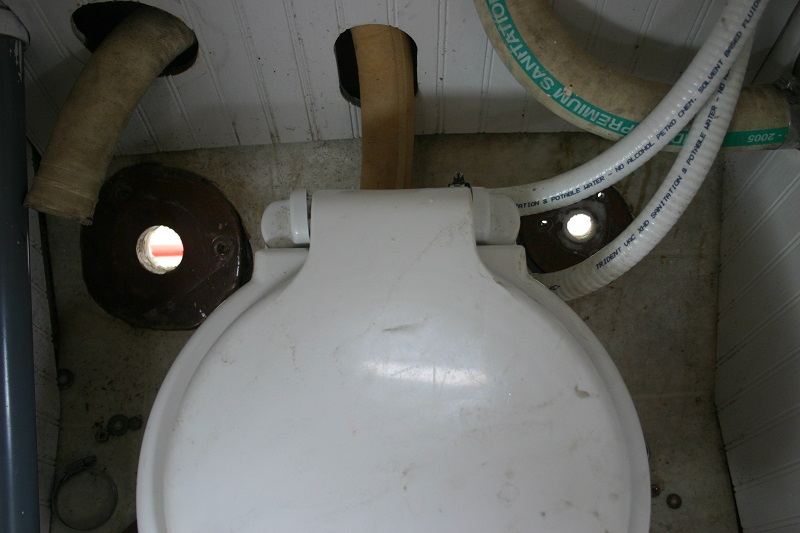
One of the first projects this year will be replacing all the seacocks with new bronze fittings. The new Marelon seacocks I put in a few seasons ago are failing already,(the head inlet broke and I could only flush my toilet by disconnecting the toilet supply hose and putting it into a bucket of water - not exactly convenient). I will have a blog post just for that but be assured I am not amused with Marelon right now. At last count I need 9 seacocks. Where so many holes in my boat came from I don't know but I don't want to wait for the next failure so out they come.
I have also been doodling plans for an electrical system. Hopefully, that will be the fun upgrade this year. Not sure if I will complete it but make good headway I hope at least. I have been daydreaming about all the things I want and at least allow for them at some point in the future. I might go with something simple to start but easily expandable over the next few years. I have been debating but I am going to put in a simple AC system. I have no intention of sitting at the dock with shore power (watch me eat my words...) but I want to wire in some outlets for working on the boat in the off season and it doesn't make sense to wire up the outlets and not put a simple panel and external connections. I definitely don't need AC power in the boat but it is one of those, might-be-nice-someday things and I want to be able to power up tools and heaters and such over the winter without dragging a cord through the boat. It is a luxury but then again, this whole project is a luxury so why stop now?
The basic plan is a housebank that will be charged through a battery combiner when the engine is running with the option of solar and possibly wind charging sometime in the future. The two electric bilge pumps on a hot battery bus and a switch panel with ... at the moment... about 12 circuit breakers. (That number keeps going up...) Things to wire up early would be some navigation lights both on the deck (for motoring) and a masthead (for sailing). I have diagram of a Triton and I keep scribbling all over it and looking at the best way of running the wires. It keeps me entertained at night.
Perhaps more important that an electrical system (but definitely not as much fun) will be apply lots more varnish. The exterior has always been a game of catch up and I never get enough down. Getting more varnish down on the inside will allow work to proceed in there as well. The stove is one of those things just waiting for varnish before mounting the stove cabinet. Finding a way to secure propane tanks on the aft deck and plumbing the gas to the stove is another 'must do' project this year.
Rigging stuff includes lazy jacks. I can't go another season without them. Then there is the windvane lines that would have been done last year if I hadn't been stupid and decided to work on the tiller head on the mooring.
Over all, I think the plan is finish a bunch of half done projects and then start the electrical system.
Hopefully, I will find something to entertain you with this summer.
Oh, and buy some land so I can stop paying ridiculous boat storage fees and I can build indoor heated storage for Jenny and varnish to my hearts content in February.
Spring is here and boatwork has begun. More interesting stuff ( and less 'hopeful dreaming') coming soon!
Take care and keep the dirty side down ;)
There she is poking her bow out among a bunch of ugly ... things... I don't think Jenny is very happy with me at the moment.
Thankfully, the winter cover held up just fine and two weeks ago it looked just like I left it in October. I checked on it every week or two but with 3-4 foot snow drifts around the boat at all times I didn't get too close. The spring has been cold and wet and with Jenny not going in this year I have been spending time around the house. So far I have delivered five pickup loads to the dump. Most of that stuff is leftovers from boat projects and previous year's winter covers so I guess in a way I have been busy working on the boat...
Jenny is in the middle of a mash of boats and with the mud finally drying out and boat owners behind me anxious to launch I figured last week it was time to take down the winter cover. If you remember, I mentioned that the winter cover went up during a rainy weekend and the boat was absolutely filthy when the cover was complete. Well, the dirt was still there so last weekend was take down the cover and clean, clean, clean...
While washing the hull I could see many more indications that other boats have been rubbing up alongside Jenny. They left their wax and gelcoat smeared across the topsides. Some cleaning and rubbing took care of most of it. The rest will be fixed when I re-paint...
Because I was in such a rush to get the boat covered up last fall,the interior was never cleaned up and it was quite messy inside as well. This weekend I have been cleaning again trying to make amends for my lack of attention. Last fall on the trip home I became aware of a mold problem. Over the winter the problem didn't resolve itself so today I was crawling around inside all the storage areas spraying a bleach mix and hosing everything possible out. I took a big bite out of the mold but I have a feeling I will be fighting it for a while. There are a lot of nooks and crannies inside and I have jammed a lot into those nooks. When I built the interior bits I always had in mind that water will get in and it needs to flow out somehow. This was helpful when I decided to bring my hose inside and just open up inside some of the storage lockers. After that it was back to hands and knees and a squirt bottle with paper towels. Owning boats is SO much fun sometimes.
One of the first projects this year will be replacing all the seacocks with new bronze fittings. The new Marelon seacocks I put in a few seasons ago are failing already,(the head inlet broke and I could only flush my toilet by disconnecting the toilet supply hose and putting it into a bucket of water - not exactly convenient). I will have a blog post just for that but be assured I am not amused with Marelon right now. At last count I need 9 seacocks. Where so many holes in my boat came from I don't know but I don't want to wait for the next failure so out they come.
I have also been doodling plans for an electrical system. Hopefully, that will be the fun upgrade this year. Not sure if I will complete it but make good headway I hope at least. I have been daydreaming about all the things I want and at least allow for them at some point in the future. I might go with something simple to start but easily expandable over the next few years. I have been debating but I am going to put in a simple AC system. I have no intention of sitting at the dock with shore power (watch me eat my words...) but I want to wire in some outlets for working on the boat in the off season and it doesn't make sense to wire up the outlets and not put a simple panel and external connections. I definitely don't need AC power in the boat but it is one of those, might-be-nice-someday things and I want to be able to power up tools and heaters and such over the winter without dragging a cord through the boat. It is a luxury but then again, this whole project is a luxury so why stop now?
The basic plan is a housebank that will be charged through a battery combiner when the engine is running with the option of solar and possibly wind charging sometime in the future. The two electric bilge pumps on a hot battery bus and a switch panel with ... at the moment... about 12 circuit breakers. (That number keeps going up...) Things to wire up early would be some navigation lights both on the deck (for motoring) and a masthead (for sailing). I have diagram of a Triton and I keep scribbling all over it and looking at the best way of running the wires. It keeps me entertained at night.
Perhaps more important that an electrical system (but definitely not as much fun) will be apply lots more varnish. The exterior has always been a game of catch up and I never get enough down. Getting more varnish down on the inside will allow work to proceed in there as well. The stove is one of those things just waiting for varnish before mounting the stove cabinet. Finding a way to secure propane tanks on the aft deck and plumbing the gas to the stove is another 'must do' project this year.
Rigging stuff includes lazy jacks. I can't go another season without them. Then there is the windvane lines that would have been done last year if I hadn't been stupid and decided to work on the tiller head on the mooring.
Over all, I think the plan is finish a bunch of half done projects and then start the electrical system.
Hopefully, I will find something to entertain you with this summer.
Oh, and buy some land so I can stop paying ridiculous boat storage fees and I can build indoor heated storage for Jenny and varnish to my hearts content in February.
Spring is here and boatwork has begun. More interesting stuff ( and less 'hopeful dreaming') coming soon!
Take care and keep the dirty side down ;)
Subscribe to:
Posts (Atom)