Monday, April 28, 2008

Stop cutting down and start building up!


Hopefully, this will be the last modification to the interior and all my energies will be focused on the re-building from now on. I have been thinking about this cut for a year now. I am glad I did it. I was worried about the visual impact but so far I am happy with it. Plus, I get better access to the icebox so I can raise the top by several inches giving me a bit more capacity in my capacity starved cold storage area.

I bet the look would be even better if I did the same to the port side. Then the whole mast beam and supports area would be visible. It would also make the exposed head feel that much more exposed so I am going to leave that bulkhead alone.

I have a rainy couple of days coming up so I am going to concentrate on making some money and finding my next job. I am practically done anyway. A little paint, a couple of interior panels, and I am ready to sail off into the sunset...

Friday, April 25, 2008

Who's got sole?

That would be me. Or rather, that would be my boat.


Yesterday I settled the sub-sole in place for the final time. Fussing with the position, trying to keep the curved shape matched to the curved hull surface at the correct place for a consistent height along the entire length took a bit of time. Walking on the sub-sole - since there really isn't anywhere else to stand while doing this - caused the sole to flex making the operation that much more interesting. The sub-sole has also been my sometimes work surface for the past year and had a slight bow to it which made it fun beyond all expectations.

In the end, I got it all pinned down where it needed to go with several braces from the cabin top pushing the sole firmly into position. Then I filled in the slight gaps along the edges with thickened epoxy gluing the sub-sole into its final position. With all the braces and with the sole flexing whenever I got near I had to call it an early day.

Today I returned and I noticed an immediate and positive difference when I went below. The sole already felt rock solid. Much better than it ever did before. I am really not sure how much flex is in the hull in this area and I didn't really want to trust the epoxy alone to hold the sub-sole in place so tabbed the edges with 6 inch biaxial tape. Good stuff-glad I bought the 300 foot roll.

The whole operation was a bit messy and I was glad I didn't have finished decks to tiptoe across. I added a little bit of extra sanding to my future checklist. Working on the narrow sole meant an inadvertent footstep or drip in the wrong area which I couldn't seem to help. Luckily there isn't any of the final cosmetic stuff in the boat yet that I have to worry about. Soon, but not yet.

The sole took a surprisingly large amount of epoxy to secure in place (rough estimate = 100 pumps with the normal WEST SYSTEM pump dispenser). I thought my edges were pretty tight but I still managed to use up a lot of thickened epoxy and those 8 foot biaxial tabbings soak up even more epoxy. I think I am going to have to bite the bullet and buy another jug (4.35 gallons) of epoxy resin. This will be my third (or fourth) on this project. That will be more than enough to finish this boat but there will always be another boat in my future I suspect.

Who's got sole?

Wednesday, April 23, 2008

Captain Overkill strikes again!

Mid-week update. I have had some paying work that intruded on my time this week. Shame with warm and sunny being the daily forecast for the past two weeks.

I am sure some people wonder why it is taking me so long to get this project done so let me present exhibit 'A'.


The original Triton sole (on mine at least) was a 1/2 inch plywood base with a teak veneer on top. By the time the boat came into my possesion (at 39 years old) the sole was a bit 'squishy' underfoot. Mostly it was the lips that held the hatches that accessed the bilge in place. I was getting nervous about stepping on the hatches and falling through.

I also wanted to add the bilge water tank so the two issues conspired and I grabbed my trusty skilsaw and cut out the sole in about five minutes. I must say the added headroom up forward was nice and I will miss it when the new sole goes in.

Anyway, I decided to increase the thickness of the sole to 3/4". This was the first step to "Overkill" status. At the time I thought I was going to install another teak veneer on top just like the original. Then I saw Nathan Sanborn's floor on his Triton "Dasein" (www.dasein668.com). A very nice application of real red birch planks. That got me thinking about real wood. After some searching I came up with something totally unexpected, Bamboo plywood. A very different look from what I was thinking originally but I like it.


I have a sample of cherry plywood for contrast. I think I will use the cherry for my settees and bulkheads.

The plywood is 3/4 inch so I went from a 3/4 inch of sole in the original installation to 1.5 inch thick sole in my current plan.

Getting back to that first picture. I had some fiberglass cloth that was never going to be used on this boat so I thought "why not" and sheathed the underside of the fir plywood sub-sole in fiberglass. Water intrustion should not be an issue with this sole. That makes Overkill step #2.

Finally, as I have mentioned in the past, I am adding insulation to the boat. I thought, "why not" and added it to the underside of the sub-sole as well. Probably unnecessary and perhaps totally useless but while I had it apart I thought I would try. The insulation was just scraps from other areas of the boat anyway and would probably have gone unused.

I have heard some sailors with experience in the polar regions argue against insulating the hull that is in contact with the water. Their reasoning is that the water is going to be the warmest thing around and you should use it to add heat to the boat. In my case, I would very much like to travel into the Actic circle area but in summer months only! I envision the insulation helping to keep my bare feet warm in the spring and fall when Maine/Canadian water temperatures can be a bit nippy. No winter polar experiences are in my future. It might help. It might not. While I had the opportunity I took it.

I ran out of time today and I have more paying work to do today. Tomorrow I am going to see about putting in the sub-sole permanently.

Friday, April 18, 2008

Interior puzzles

With my sander out of commision temporarily, I thought I would get to work putting a cabin sole back in so I could stop using the shifty temporary plywood panel I have been using for almost a year now. The panel was supposed to be the cabin sole sub-floor but after a year of working over it I am not so sure. I am going to see how well it cleans up.

That meant that I first had to get the bilge finished. Second on the list was a good cleaning. As usual, it took three times longer than expected. I decided to divide the area in front of the bilge water tank into two sections. The forward section will be general storage but the aft section will be used as 'cool storage' for foods that don't require refrigerator temperatures. This should help out my small icebox situation a lot in Maine and Canada. There isn't enough room to keep a good supply of ice on the entire boat for tropical cruising so I am not even trying to make that possible. Its a small boat.

The picture is a bit tough since I took it right after painting the bilge with white bilgekote . The sun was coming through and making it quite bright. I blocked out what I could with my tubby frame but the picture is still a bit washed out.


I had some small teak strips from a lawn table that I put to decorative use in the aft section.

I also added some braces on top of the bilge water tank. Nothing too stout. I may have to get them off someday. Even if the braces failed the cabin sole will keep the tank where it belongs. The braces are just there to keep the tank from jumping up and down several inches between the bilge and sole if the worst conditions ever imagined occured. That tank isn't going anywhere. It sits on a three inch wide board the whole length of the bottom with a layer of foam to resist chafing. The glassed areas are actually boards on either side of the tank to keep it from flopping side to side. There are a couple of wedge pieces (epoxy soaked fir) down lower on the sides of the tank to keep the lower half of the tank from wandering too. There are heavily tabbed one inch pieces running the full height, front and back, keeping the tank from moving forward or backward. I really don't think the tank is going anywhere. Tough to make a secure tank mount and still give the tank room to expande with temperature. I hope it all works out...

The settees were left a little long since I didn't know how I was going to tie them into the galley at the time. My original thought was to leave the area open to maximize storage depth on either side of the engine. I was also considering putting a top loading icebox on the port side next to the engine like several other Tritons. That didn't work for me because I need to access the port side of my Atomic Four for regular maintenance. Getting sufficient access was diametrically opposed to making the largest icebox possible. I gave up and put the icebox in the hanging locker area. After some more thinking I decided that it made it too complicated for the little storage area I would gain by creating a floor that followed the hull surface so I went ahead and ran the settee surface back to the rear face of the cabin. I have heard of people cutting holes big enough for cooking pots to drop into where they can't bang around. I might do this eventually. In any case, I took the easy route. Of course this meant blocking off the ends of the under settee storage areas so that items wouldn't slide back out of reach. Nothing is truly simple.


In the picture, I haven't secured the rear panels. I didn't have the right assortment of fiberglass materials to do some tabbing first so I am leaving then until later. The cutout on the starboard side is where I have a seacock mounted. This was where I had the engine raw water inlet that kept clogging up. I am keeping the seacock there as a salt water inlet for the galley.

I had some spare time so I started attaching the little bits that will hold the back panels in the storage areas behind the settee backs. Because I am insulating everywhere I can't just use the hull as the back of my cabinets. Have I mentioned that this insulation idea is a pain in the butt? I was lead to believe it would be an easy project (a weekend project according to famed boater and author Ferenc Mate) From my experience it has complicated everything dramatically and greatly increased the workload. I only hope it is worth it.

In the midst of all this was various small patches and tabbings to improve what Pearson had done in the factory. I also added the rear galley countertop support. You can see that in the photos if you look for it. I will be adding the rear panels that seal off the cabin from the under cockpit area "any day now".

Finally, I had about 3 inches of dust/mud in the bilge along with a large assortment of construction waste and a couple of lost tools. I utilized my new garboard drain and flooded the bilge to wash out what I could. The rest I had to slowly suck up with my wet/dry vac. I am pretty rough on that thing and I don't think it is going to live a long life.

Flooring material had to be ordered and is taking longer than I expected to obtain. should be ready for install next week or two. Again, all depending on the upcoming hull and deck primer.

Have a good weekend!

Shalom

Monday, April 14, 2008

Another day at the office

Some times you just have to be reminded that this boat once floated. This particular photo was taken in Cows Head harbor in Maine near Machias Bay.


Today I removed the tarps and the supporting framework. No more stooping and cursing everytime I move around on the boat. Its all wide open again.

I went back to sanding until I wrecked my sanding pad... for the second time. Seems the hook and loop sandpaper disk departed the sander and I didn't realize it. I noticed the paper wasn't cutting too well so I leaned into the sander a bit to help it out. Leaning on the sander when there is no paper attached melts the fine plastic hooks in the hook-and-loop system in a matter of seconds. I will order a new one tonight but I won't have a working sander again tomorrow. That might not be a totally bad thing. I really want to apply fresh primer to the deck and hull but the temperatures really aren't there yet. It is frustratingly close but a small delay would probably be better.

I did the final trimming on the 3/4" plywood that will make up the underlaying portion of the cabin sole. It fits now and let me tell you it is a real pain getting it to that point. Nothing is smooth or fair or symmetrical so it takes many attempts to get it right. The final shape is a twisted, warped looking thing that fits pretty tightly around the edges of the hull/keel part of the boat. I am putting it back at the height of the original sole ... I think... I really am not that sure since I started the project a year ago and I have long since ground out any remaining clues. The plywood is 17 inches below the settees. On top of the plywood will be another 1/2 inch of decorative wood strips so the drop from the settees to the floor will be about 16.5 inches. There is also four inches of foam cushions on the settees so it should be fine. It was a comfortable height for me( who cares about anyone else) the last time I had a finished sole installed.

I am searching for a type of wood to use for the decorative layer. I plan on teak veneered panels in the main saloon so I would like to choose something else so I don't have too much teak to look at. I was wondering about cherry but I have never seen it used as a flooring material before. My boat neighbor suggested maple and I could stain it to whatever color I wanted. This actually makes sense to me.

Since I have to wait for a new pad for my sander I will probably finish up some details on the bilge water tank and make a divider in the bilge for separating a small 'cool food storage' area and the rest of under sole area that I will use for general heavy boat hardware storage (extra anchor chain and the like) tomorrow.

I am still looking for photos of my settee construction.

Dinner time.

Sunday, April 13, 2008

Rainy day musings

Rainy stay at home and eat brownies kind of day.

You know, a myth I hear all the time with these old boats, and one I vehemently disagree with, is the notion that the early builders did not know the strength of fiberglass and thus 'overbuilt' them resulting in the relatively large hull section thicknesses found in early fiberglass boat construction. Simply not true in my opinion.

I have a recorded interview from Everett Pearson, one of the Pearson cousins who founded Pearson Yachts (builders of my beloved Triton). He was asked to comment on this myth and his response was, "We knew exactly how strong this stuff was. We just built to a higher standard". He goes on to say that while fiberglass technology was new and evolving daily, every major piece of the Triton was sent out to be tested to the point of destruction to find out exactly how strong it was.

Here is a picture of a typical core I removed from the hull where a seacock was to be installed. This piece is from the recently installed garboard drain.


This a a fairly typical core. This particular one is about 3/8 inch thick. I have found sections up to 3/4 inches thick. Other Tritons are known to have sections over 1 inch thick. Note the dry fibers with little resin. Early construction techniques are not what they are today and the layups are of particularly poor quality. They just hadn't figured out how to do better so they made sure it was strong enough by increasing the total core thickness. I have to agree with Everett. I think the early boat manufacturers knew exactly how strong the new fiberglass material was - at the attainable levels of quality available at that time. Nowadays they can do much better and thus the hull thicknesses are much thinner and lighter.

That's my opinion.

Last year I had the entire interior out minus the bulkheads. The bulkheads are sound but definitely not square in the hull which makes matching up the interior furnishings that much more interesting without any square surfaces to begin with.


I can't find my pictures so I will say more about the current status later. Suffice to say the V-berth has been built back in (after the V-berth water tank was installed as I have mentioned in an earlier blog) and the saloon settee bottoms are back in. Foam insulation was glued in and hard panels installed against the foam to create new bottoms for the storage lockers under all the areas built back in. I am probably about half way through the insulation processat this time.

The brownies are coming out of the oven. I have to run...

Saturday, April 12, 2008

Bits and pieces

Thursday was a beautiful warm sunny day. I had big plans but I got talking with a fellow boat restorer at the yard that I had not seen since last fall and we wound up catching up for a few hours. As he said, on the first warm day you really just want to bask in the sun like a couple of lizards.

I did get the battery shelves tabbed in with two layers of 14oz biax tape. The whole time I am thinking, "this is way overkill" but I am comfortable knowing that those shelves are going to hold the batteries for a long time. Even if the boat sails upside down for awhile...

Yesterday, the rain was supposed to start late so I had some small projects I was going to do. I got rained out after half an hour with nothing accomplished.

Today, it was supposed to rain hard all day but around 11 o-'clock the skies cleared and the sun came out so I changed plans and drove out to the boatyard.

Last fall I bought a 2 wheel drive pickup with some issues just so I would have something to work out of. I still don't drink or eat in the Honda and only once, in a dire emergency did I let a dog ride with me. Hey, it is my first nice car and I would like to keep it that way for awhile. Anyway... I keep a tool box in the truck permanently so I don't have to move the toolbox in and out every time I do some driveway car maintenance for someone (or myself) Having the extra tools handy has been nice. To make it even better I took out the passenger seat for more tool storage. Now I make fewer trips back to the house to get the tool I forgot. It is working out quite well having my own mobile shop.

Why did I start talking about this?.

ANYWAY...

Today, I installed my garboard drain plug since it was an easy job and warm enough for the 5200 sealant to set up. While I was at it I went ahead and installed a seacock for the engine raw water inlet. For my other seacocks I have used 3M 4200 so I could tell myself that I have a hope of removing the seacock if I ever needed to. Today I had a whole tube of 5200 and just the little garboard drain fitting so I went ahead and used the 5200 on the seacock as well. If I ever have to take the seacock out I am going to have to remove it with a grinder.

There is a mystery associated with my raw water engine intake. Originally, the water came in from the starboard side behind where the engine sits. The water pump is on the rear of the engine so it makes sense to locate it here. The original valve was not a seacock however. It was just a thru hull with a ball valve on top. This is done all the time but it is a bad practice. Thru-hulls use straight threads. Ball valves use tapered threads. The two types of threads don't go well together. You can force them together but I, being a mechanic by trade, have a hard time living with that. In addition, the through hull/ball valve setup is vulnerable to an impact from the side. A real seacock has a wide mounting surface that spreads the load to the hull much better. Seacocks are the only way to go.

So... I knew I was going to replace the thru-hull/ball valve setup. In addition, my engine had been converted to fresh water cooling so the raw water was being re-routed to the front of the engine where the new raw water pump was installed. It made sense to me to relocate the new seacock to a position closer to where the water needed to be- the front of the engine. That spot turns out to be where the galley drain is located on a Triton. I had already removed the galley drain since it was just a fiberglass tube 'glued' into the hull - also totally unsatisfactory.

This story is going on much too long.

Okay, so the mystery is this. After I launched I met up with two Triton owners and we cruised from Casco Bay to Penobscot Bay for a week. I was having overheating problems and it turned out my raw water strainer was getting plugged up with seaweed. Now, my two buddies have their raw water intakes in the original location. I was almost always traveling the same path give or take 100 feet or so. They had no problems all summer and I was cleaning out my strainer daily. Hmmm...

My best guess is that there was something about the water flow at the new location. The new location was about 3 feet further forward and slightly deeper that the original. It should have worked fine. Maybe the water swirls more at the aft location drawing the crap away from the intake. Maybe the water flowing by the hull in the new location sucks surface crap down into the path of my new intake location. We all had the same strainer/filter setups more or less. I had a problem they didn't. Are you confused too?...

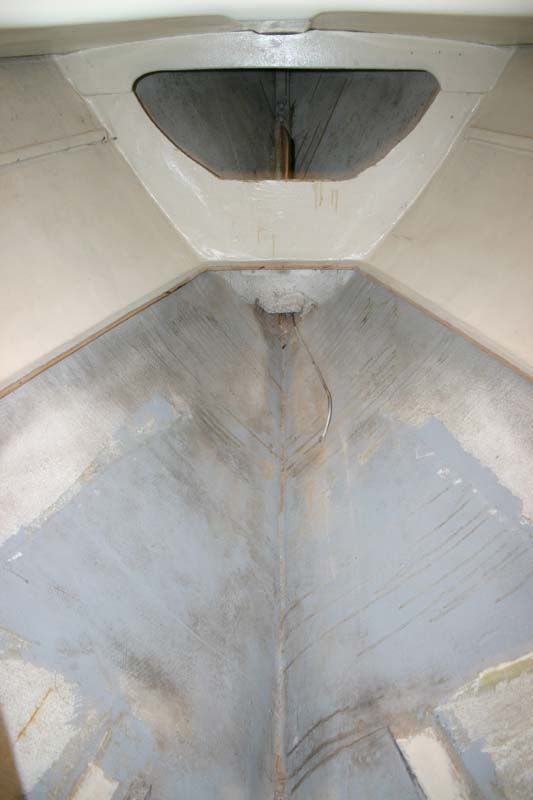
So. My solution this time is to relocated the intake again. Today, I moved it to the port side and down in the keel section at least two and a half feet below the water line which is about another foot and a half further down than the original. I am thinking this should get me below the level of floating crap. If not then I will take it out and try again. Maybe I will just go back to the original location and run the water lines forward.


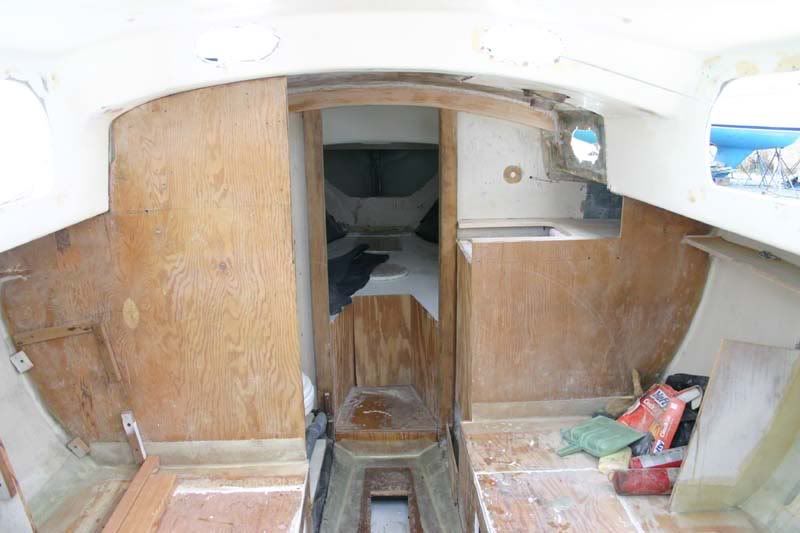
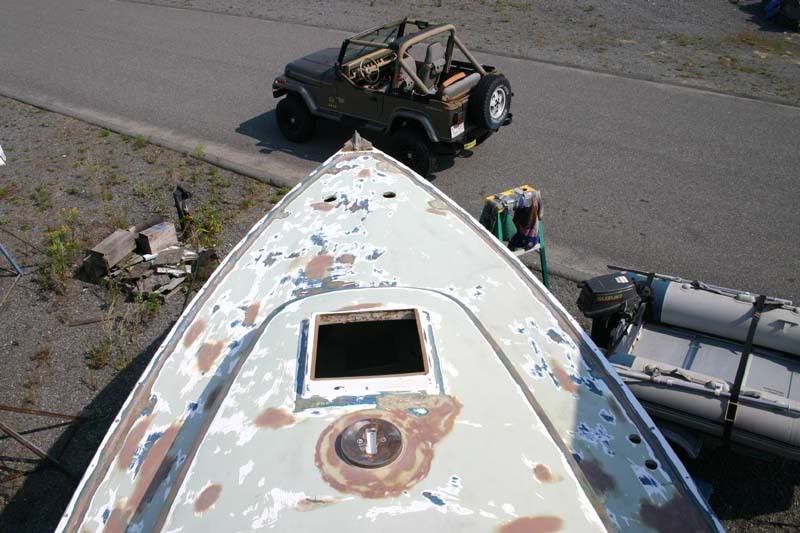
Pictures. Just one today. I didn't take any interior pictures since I am embarrassed about the condition of my bilge. My late model Triton has a deep open bilge that is difficult to get to and all sorts of crap falls down there as well as an entire summers worth of sanding dust which is now more like dried mud. Next week I plan on a thorough flush but for now I am not taking pictures :-)

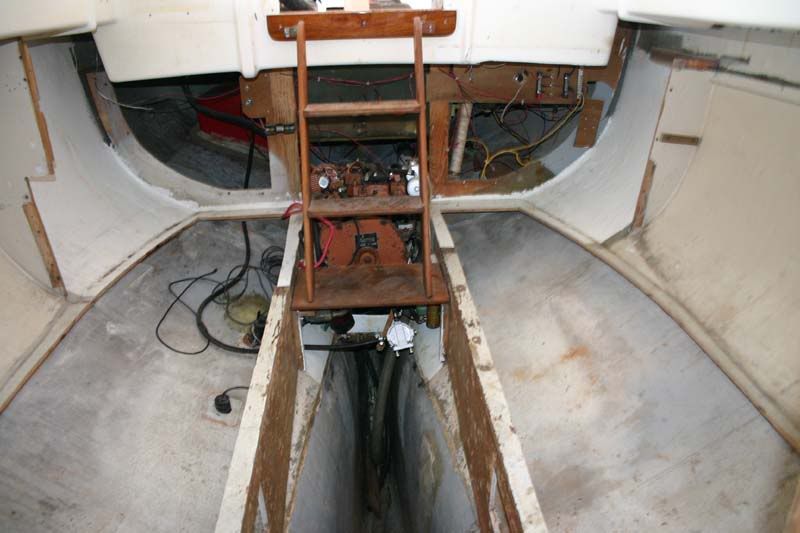
I also did some planning as to the new routing of the water lines and mounting of the strainers along with new fuel system routing. I was thinking about moving the fuel filter/separator back by the new fuel tank along with the electric fuel pump but there wasn't room for both and it really didn't make sense to re-invent the wheel over this. I am going to stick with my last setup which keeps everything I need to service on the engine under the first step in the companionway in front of the engine. Tritons normally use this spot for the battery but I moved mine a couple of years ago closer to the engine starter and under the galley.

Finally, I did some measuring and tried to get back up to speed on the cabin sole project I left half done last fall. While I was doing this the rain came and I had to hurry up, button up, and skedaddle.

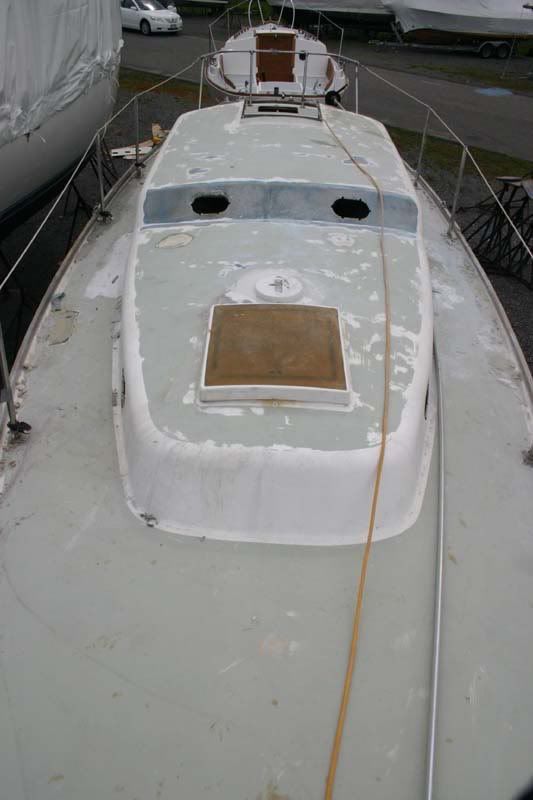
Next week, weather permitting the winter cover is coming off so I can finish the last bits of sanding and think about applying primer to the hull and decks. The cabin sole project is also high on the list for when my back gets tired of sanding.

Em Tasol.

Wednesday, April 9, 2008

House Battery Shelf

Warmth!

This was the first time this year that was above the minumum epoxy temperature range so I changed gears and installed my house battery shelves, cleaned up my fuel tank installation, and put a little more fairing filler on a couple of spots on the cabin liner.

It started getting late before I tabbed in the shelves and I think I learned my lesson about pushing the weather window so I need to go back tomorrow and add tabbing to the battery shelves.


It was important to get these shelves in before I could move further with the 'under-cockpit' or galley areas. Now I can think about painting under the cockpit. I only showed the starboard side but I have an identical shelf on the port side. This will allow up to 4 group 27 batteries. I don't know if I will ever use that many but it is much easier to put in the shelves now rather than in a few years when I realize I don't have enough house battery capacity. I can envision parking the boat for a while and not running the engine much so the extra capacity will come in handy. Twice that would be even better but this is a Triton, not a real big-and-beamy cruising boat, and I think this is a good compromise. James Baldwin (2 times circumnavigator on a Triton with no engine) uses 4 T105 batteries totaling 440 amp hours. If it works for him I can only hope it will work for me.

Note: the two sides of the hull are NOT identical and the shelves are not mirror images of each other. This isn't the first time I have run across instances of assymetry. It is what gives the boat character.

I also bought stainless steel threaded rod and cut it to length which will be used to clamp the batteries down when I get that far (probably not until next spring)

McMaster and Carr is great. I ordered more sandpaper yesterday morning and it arrived around noon today. In order to finish the sanding I need to remove the winter cover framework. I am not sure if I will do it tomorrow or wait until the forecasted rainy weekend passes. It is supposed to be REALLY warm tomorrow so I will probably succomb to the temptation to see the whole boat and remove the cover completely.

Ah, life is good again now that I can work on the boat..

Monday, April 7, 2008

Endless sanding...

Now I remember what life was like last summer...

I spent a few hours sanding down the botched primer again. It was quite depressing. I feel like that is all I did last summer and it feels endless. It is mostly done. I need to order some more sandpaper and I have a couple more hours and then I will be ready to apply primer again. The high build primer that I am removing sands very easily a few days after application - like butter with 120 grit paper. Today, 5 months and a long cold wet winter later I am sanding with 80 grit and it is more like concrete.

Some people may not know why I am sanding off the primer. I applied it late in the season and danced around a few rain clouds and cold weather. I pushed the envelope because I was anxious to get it done before winter set in. Rushing, as it turns out, was a mistake. The primer bubbled up after a few days in a couple of spots. Because I was uncertain about the rest I decided to remove it all and be on the safe side. Awl-grip top coat is expensive and I didn't want to see the primer pop up next summer and take the top coat with it. Better to bite the bullet and start again - or so I thought back then. Now, after the winter is over I am thinking most of the primer was actually on there pretty good. I guess I wouldn't have known that unless I had removed it though...

I thought I would post a re-cap of last summer's deck work.
Over the past few years I have been dealing with several small issues with the deck and core. For the most part the coring was sound but I did have to replace some small sections like under stanchions and the working jib tracks. The good thing about my Triton, unlike most out there, is that the core was mostly intact. Someone had installed a wheel in the cockpit and the cockpit sole wasn't sealed properly and water got into the core and it was a total loss. My first year I recored the sole. The aft deck was also pretty mushy and I got around to recoring it last year. The goal for last summer was to have the deck and hull primed for paint so that it could be painted over the winter. As I mentioned I didn't quite make it.

This is what the deck looked like last summer after a lot of small projects.


As you can see the gelcoat was shot. I could have filled in the cracks and painted but after five or ten years those cracks would have started showing through. The only real fix was to remove the gelcoat.


It was a long nasty job. No other way to say it. It was mostly removing the white portions of the gelcoat. The non-skid areas were thick and soft and didn't seem to have an issue with cracking. In some places it had bubbled up and I removed it aggressively whenever I found areas like that. I have seen some bad examples of this. In my case however, it was limited to a few spots, mostly on the sidedecks and areas that were particularly prone to being wet.

Then I did some fairing.

Finally, there were millions of little pinholes in the laminate where the white gelcoat was and the best way to fix them was to mix up a thin mixture of epoxy and fairing filler and simply paint the entire white portions of the deck surface with it. This then all had to be sanded down... again...


On the way, I took a break and tackled the last of my deck core issues.

The original aft deck. I have become quite handy with the circular saw and in a few minutes I had cut the top skin off to reveal this...


U-G-L-Y...

I cleaned out the wet rotten balsa and sanded the bottom skin smooth. ...And glued down new balsa with thickened epoxy.


And finally, I glued down the top skin, ground down the edges and applied a couple of layers of fiberglass tape to tie the skin to the rest of the deck, faired the whole thing smooth and voila! Good, sound, aft deck.


I have tons more pictures but only limited server space to hold them so I guess I had better stop here.

I took a break today and started looking again at my galley. I am not sure how I am going to implement some of my ideas but I think I am going to just go ahead and start putting in the basics for the galley counter. Later I will figure out how to make it all work or what I just have to give up on.

What I really want is to put the sink right in the middle over the engine. The original Triton sink sits in the starboard corner but I am hoping to improve access to it. I am not sure how yet. Creating a drainage system that will easily get out of the way for engine access is the problem. I guess most people leave the sinks where they are simply because it is the best place for them. I am going to fight with it a bit longer...

With some warmer weather this week on the schedule I hope to tab in my battery box shelves under the cockpit. Then I can put in the aft 'bulkhead' between the cockpit and the cabin. Then I can put in the galley counter and get to work on the other saloon paneling....

Tomorrow is my birthday and I will be away getting showered with birthday presents. The weather is looking promising so I can look forward to getting some more work done this week. Soon it will be all good weather!

Fair winds and following seas...

Thursday, April 3, 2008

Long cold winter is over


Finally!

It has been a long winter with almost no progress. Today, the tarps were rolled back, a little spring cleaning was done, and of course I fired up the sander to remove the remains of last year's botched deck primer coat.

I am not sure yet but I think there is a change of plans in the works. Over the past six months my monthly expenses have risen about $700 a month. Add to that the increased heating bills. Add to that I was just laid off and while unemployment checks are on their way, they will be something less than I am used to. In short, money is tight.

I have mentioned that mooring options are limited. The best I can do seems to be Salem at around $1500 a season. My current thought is to NOT launch the boat as planned, pay the $600 summer storage fee and save the $1500+ mooring costs, use the time and money saved to get some panels in the interior and continue moving the whole project forward. It depresses me a bit to say this but a money shortage is my reality. Never underestimate the cost in time and cash that goes into one of these projects. Unless you have to, I strongly urge people to buy the best boat they can, take a loan even, but in the long run you are sailing quicker and on a nice boat.

In my case I love the building process and I want a boat built to my personal specs. I love the planning part. I like working out all the details and understanding the whole process and compromises necessary. I feel like I have a very deep knowledge about my boat, how it is built, why it is built that way, and what is really possible. I look forward to having a very unique Triton. I wouldn't mind hurrying up the whole project though. It is wearing me out.


I have been looking at brown splotches on my cabin liner for a while now- the results of filling in all the old holes. The picture above is from the former hole where a couple of instruments were mounted. The instruments are gone.

I sanded down all the filler and I even got into the little corners and crevices that had years of black... stuff - maybe solidified mold? - stuck to the surface. This was all on the underside and not visible but I sanded everything down all the same. Later, I will prime and paint and having a smooth, clean, fresh surface is going to be very nice after all these years of stains and gouges.


Looking up at the old hole where the original ice box used to be. I am posting the photo just to say, "Good enough". Sometimes you just have to say it. I could fuss with this for a while but it is on the underside and out of site. On the odd chance you saw it it wouldn't look too awfully bad but it is clearly not a 'finished' look. Good enough, it is just tying the edges of the hole in the liner anyway, the deck is still there.


Just a shot of the fine workmanship at the Pearson factory in the 1960's. These old boats are full of stuff like this. The Triton was the volkswagen of the boat world - cheap and practical- the fact that they turned out better than expected is just a feather in the Pearson cap. No disrespect to the Pearson's either. They did a lot with the tight budget constraints there were under.


Another Pearson beauty. The 'frame' is cracked and someone at the factory decided to repair it with some scrap lying around (the same stuff as the bulkheads -plywood with fake wood veneer). I just put this in for no good reason. I am actually going to make panels across those openings, partially sealing the cockpit undersides from the cabin. In part it is because I am not going to insulate back there and I want to keep the cabin warm air isolated, another part is to try to limit stray smells by directing all the air flow through a smaller area around the engine where the blower will hopefully keep it under control. My last boat was all open and a spilled container of lamp oil made sleeping in the cabin nearly impossible. I am not really sure it will help but it can't hurt.

With no job to get in the way and plenty of shop materials due to my purchasing in bulk, I should be able to post more regularly from now on.

I have to run but I want to also mention that I just picked up my new standing rigging and roller furler yesterday. I will post more pictures soon.

Keep the dirty side down :-)