Sunday, October 25, 2009

Not quite there...

Saturday rained buckets so no boat work for me. (I want a shop!) I find it slightly ironic that I need to protect the boat from the weather but I can't because of the weather...

Sunday found my morning taken up with helping a friend load (one of) his antique tractor(s). I want a tractor.

Then I found that I needed more galvanized hardware to bolt the structure together (so that it can be taken apart someday without destruction). Hopefully, I will have better luck with the galvanized hardware this time. Last year, after six months of being outside, I found the galvanized hardware corroded to the point where it would not screw apart and had to be destroyed to take the cover down and transported home. Crossing my fingers but I don't have much faith. New hardware = $50. I also picked up 3 2x4's to form a new ridge pole. Last year I made a ridge pole from strapping with spacer blocks in between just like the bows. That didn't work too well. The ridge was too flexy and there wasn't enough meat to anchor to the bows effectively. This year I will have 2x4's which should be stout enough to hoist my engine out should I find the desire.

Anyway, a late start to real work.

First off I laid out the ground frame that I used last year. It all bolted together just like it was before. I had to make some adjustments because the boat is blocked lower this year. Or rather, it hasn't settled like it had over the two year haulout.


The frame gives the bows something to attach to on the bottom and the crossmembers keep the whole shebang from flying away. The cover wants to fly like an airplane wing when the wind starts blowing and the crossbars mean either the boat has to fly or the crossmembers have to break before the structure flies away (It can happen, I have seen pictures). It took some time to get the frame square and positioned correctly. I am working near my maximum permitted dimensions at the boatyard and I am trying not to go over the line and ruin my welcome. Boat projects are always distrusted in boatyards. Too many of them get abandoned leaving the yard crew to dispose of the mess.

Last week I had laid out and cut two bow ends to fit together.


The top spacer 2x3 was left long so that there would be enough to remove later.

Then I glued and screwed a gusset onto one frame and drilled holes for bolts on the other frame. I need to be able to take the bow halves apart so I can truck them home over the cab of my pickup.


With a pair of bows ready to go I did a test fit.


This one fits well. It looks like the bows are a little too straight so I don't think the bows will naturally straddle the boat at its widest point. I am going to have to tweek the bows a bit in the middle. Oh well.

Then I realized that I had to spend some time with the ridgepole before I could nail down the bow spacing. The 12 foot 2x4's are linked with a short piece bolted on the side. I knew I was going to roughly space the bows 3 feet apart but I needed to fudge it a bit to clear the double wide ridgepole at the joints.

Sadly, I wasn't able to erect the structure. I could have put up maybe half the bows but decided it would be more stable and productive to wait until I could do them all in one day. Each bow becomes half of a matched set and I didn't want to have half of them built and then forget which goes where. Better to do it all at once. It always takes longer than I expect to clean up and get all my tools and materials put away back home anyway.

Next week should be no problem. Unless the weather continues to challenge me...

Sunday, October 18, 2009

More winter cover building

I finished up building the bows yesterday and spent some time figuring out how I am going to tie them to each other and to the ridge pole. I had hoped I could find some hardware to save me time and make disassembly in the spring easier but in the end, plywood gussets were the way to go.

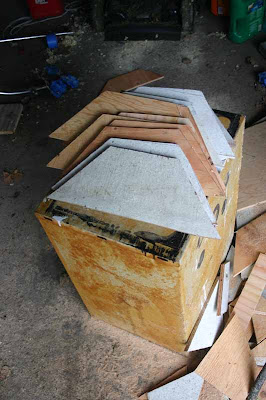
Today, (Sunday) is rainy and cold so I made the gussets with scrap plywood. Some of the pieces were from my old settee bottoms. I like recycling stuff.


Ho hum. Not very interesting. Next week I am all set to erect the structure and if I have money in my bank account I will order a new tarp for the new structure.

Way too much work for a simple winter cover but another project of mine is finding a piece of land to call home. Should I be succesful this structure will probably find other uses there as well. I can only hope.

Barn raising next weekend!

Sunday, October 11, 2009

Making a bow

Making several actually.

I started the weekend with some material shopping.


I am right about $200 in materials so far which is about right for me. I seem to spend $200-300 every season on structure upgrades and new tarps every other year.

Then I had to spend some time laying out the profile for the shelter I have in mind. The bows I made last year were bent into position as I went along and by sorting through them I found one that would make a good form for the new bows. This design is based on what I have seen of Stimson sheds but the profile is different because I don't have the width to height ratio of a real Stimson shed available to me. My bows are relatively straight near the bottom and have more curve towards the top.

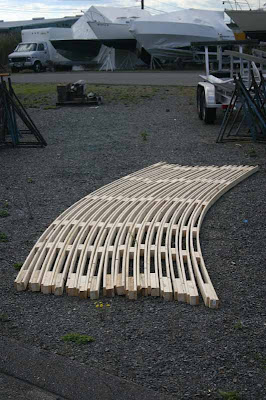
Using an old bow as a form I took one 16 foot piece of strapping and glued and screwed short blocks made from the 2x3's.


Once the single strap was clamped into position I glued and screwed the second piece into place which locks the curve into the bow.


I built two bows and then checked them to make sure the boat would fit under them.


and then I made fourteen more. The first few were exciting but the routine got pretty dull pretty quickly. I had hoped to get more built this weekend but a lack of enthusiasm and a lack of glue ended my work before the last few bows were made.


At the moment I have enough bows to space them about 4 feet apart. I think next weekend I will make a few more so that I can space them at something like 3 feet. Then I have to figure out how I am going to tie them together. I need to find a way to lock them together solidly but make them easy to break apart and truck home every spring.

Today, as I was thinking about this structure idea and how it has developed over the past few years I realized that it all started when I had no deck hardware to attach to. The self-supporting idea sprang up after I removed the stanchions and had nothing to attach a frame to.

This was my first cover and it worked quite well.


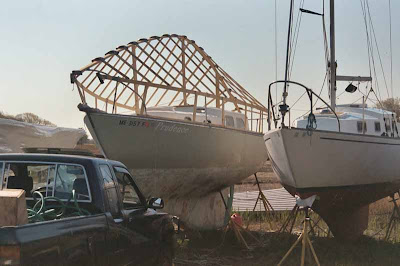
Later, I needed to keep the tarp off the hull so I added three bows per side to hold the tarp out with two stands on deck to support the ridge pole.


What I could have done this year is spend an hour mounting the stanchion bases (which I already drilled and filled for the mounting screws) and then attached a frame to the stanchion tubes again like most normal boat owners.

Oh well, at least this way I will have a nice roomy structure to play under all winter. I think I am satisfying my need to build stuff. My boat cover is my substitute 'shop' until I can find one of those. I dream of finding a bit of land where I can build more 'stuff'

Sunday, October 4, 2009

Getting Sole.

Raining cats and dogs Saturday so no outside work for me. I find it a bit ironic that I can't protect my boat from rain because it is raining. Maybe it is just me. When it started to lighten up a bit I was able to run power out to the garage and work on the cabin sole a bit.

I had transferred the hatch locations from the under-sole to the plyboo (bamboo plywood) sole before I installed the 3/4 inch fir plywood undersole. That was over a year ago but the markings were still there so I started the cuts by drilling holes.


The holes are a good place to start the cut and they provide the finger holes needed to pick up and grab the hatch panels. I am sure a fancy latch system would work too but this is how the original sole was set up and it worked just fine so I didn't see the need to complicate it. Plus I have drainage to the bilge should I have a water instrusion issue.


Then I taped off around the cut to protect the plyboo from the saber saw and started cutting. I should add that I considered cutting without the tape but that didn't work as you can see in a following photo that the first (aft most) hatch has some saw marks around it. It sands up quite easily but I think it best not to mark up the material if at all possible.


There are three panels in the sole. The aft one is just an access to the water tank access panel. It seems a shame to have a big hatch for something I will rarely need but going hatchless wouldn't work either and designing a seamless removable panel wasn't worth the effort. The middle and forward panels access storage areas in the bilge.

The blade I used seemed to have trouble with the curves I laid out. The curves came from a top of a spray paint can. It just looked about right. The blades had issues with the corner and I would have been better off with a thinner blade. I had to force/burn/struggle to get the blade around the curve. Next time I guess.


Today, the rain stopped (though the threat of rain didn't) so I decided to take the panel out to the boat for a test fit. In the year and a half since I cut the panel I had forgotten how much I had left to trim up later and what marks were to demarcate the beveling against the curving hull. I spent some time with my block plane and got the panel close. There is more fitting to do but I ran out of time today.


I am very excited about my first impressions. I can already imagine the cherry veneered plywood on the vertical surfaces in the cabin. I am really REALLY sick of bare plywood interiors.

Here is the same thing with the hatches removed.


The hatches in the plyboo were built larger than the holes in the sub-panel so that there would be sufficient support for them. In the original construction, the hatches were supported by one inch strips of mahogony screwed into position. These were falling out and a bit hazardous when I got the boat. I think the new system of a narrower hole in the sub-sole will be vastly stronger and longer lasting. I was a bit too generous with the size of the supporting structure though. I could probably open up the holes a bit.


On the other hand, it is plenty strong the way it is now which is a good thing. I started building the sub-sole before I decided on the 3/4 inch plyboo material. If I had known I would have gone with something thinner for the subsole and perhaps used small strips to support the hatches. As it is, I will now have a combined total cabin sole thickness of 1.5 inches. This is going to be a very stout sole. Luckily I thought to lower the sub-sole below the height of the original sole. I still have an inch of clearance between my head and the cabin top. If you are any taller than me you are out of luck. But its my boat and I built it just for my dimensions and it works for me. And that's that.

And that sums up the weekend on the boat. I still hope to build a cover for the boat as soon as the weather cooperates. If not, well then I will work on interior projects which is what I would rather be doing anyway. ;-)