Saturday, June 27, 2009

Checking in

I have been anxious all week with the steady rain. I had no idea how dry the boat was and I have been worried about getting a call from the harbormaster or arriving at the boat to find it floating at the gunwales. Thankfully, Jenny was just fine with all the rain. A few strokes with the manual bilge pump was all that I could get.

Getting to the boat is a bit of a chore at the moment. The 'rules' limit dinghies to 10 feet on the dock. For now, I am making use of my great-grandfathers skiff that he bought used in the 1960's. I had turned it over several years ago and sold the trailer because I was tired of paying registration on a trailer I wasn't using (plus I needed the cash for boat supplies). A trailer would be nice right about now.


Not a particularly classy way to travel but at least I save five dollars. When I went to the public launch ramp the attendent told me that I could use the free ramp for 'roof mounted boats'. I think he wanted me as far from the busy ramp launching operation as he could get me. Its a chore but it is getting the job done.

With the forecast calling for 50% rain all day, I decided not to drill any new holes in the deck for deck hardware. Instead, I hauled out a bunch of supplies and fussed over a few things. I started the engine. It fired right up.


The dock is terrible and it doesn't look like the owners intend to do anything about it. Right in front of my boat is a pair of paint scrapers. I had put a fender in front of the first one last week just in case I got sloppy on the approach.


The cleats are not spaced well, some are loose, some are broken, and some are rediculously small.


I am worried about my topsides looking like my new neighbors.


I have strung out fenders on a line down the length of the boat. They will stay there when I go out for the day or weekend. Those terry cloth fender covers are very nice and I am told do wonders to protect the paint. With my wallet hemoraging cash the past few weeks I couldn't buy any but I did try the low budget option which is to use K-mart towels and tie wraps.


My neighbor has decided to tie up on the other side of the dock so I repositioned the boat to the other end and away from the paint scrapers at the end. Really, who would rent such a dock? I pity the next boat that has to squeeze between my boat and those scrapers. I have a suspicion that the other two spots on the dock are going to go unused. Now that everyone can see the docks as they are its going to be a hard sell.

I would like to thank everyone once again that came to my launch and brought gifts.


Two sporta-seats (which are absolutely awesomely comfortable and good looking), Gourmet beer (12% alcohol content - be careful!) and Pyrat XO reserve rum.

Here is one of the two stern cleats I installed in the mad dash before launch day.


I think I am going to revisit the whole design in the future. First of all, my first cut was intended to be the block height, and instead I went on the wrong side of the glued up blank and cut the width. The cleats are now a bit wider than the blocks. I might also try to tie them in with a future taffrail.

The anchor platform remains unchanged from what I built several years ago now. It has worked fine so I wasn't going to revisit it just yet. Its mahogany and the rest of the boat is teak. For the moment, it doesn't bother me too much. I am not crazy about the look of a Bruce anchor on the nose. A 'pigs snout' as someone once called it. Nevertheless, it works quite well.


I really wanted to get wood down on the edges where the skene chocks were going to go but I didn't have shaping tools with me and the rough blanks were a little large to notch into the anchor platform.

Towards the end of the day, the tide changed and the current started to really rip along the float creating a bow wave on the boat.


The fog was settling in thicker when I left but I got one nice look back at the boat as I left.


And finally back once again at the 'free' dock.


I am thinking that I am going to just put the skiff on the dinghy dock and wait for someone to complain. I would do it this weekend except with rain forecasted every day this week, I don't need my skiff to sink with rain water with my hardly used Honda on the stern (again).

Not a terribly productive day. But a nice day to be messing about with boats.

Monday, June 22, 2009

More launch photos

Without any more ado, here are some more launch photos...


Sunday, June 21, 2009

Launch Synopsis

Well, its raining hard outside so my plan to take pictures of the work done over the past few days is out.

The day before launch was a long one. Here is a list of items accomplished:

Fabricated teak blocks for the stern cleats to mount on.

Installed stern cleats - now I had something to tie the boat too!

Installed cockpit coamings
- not exactly necessary but they make the boat look so much better for the photos.

Installed anchor roller - just in case the motor quits on the way to the floating dock.

2 hardware runs to get the bits and pieces I needed to make it all work.

Stopped by the town hall to get the mooring and waterways use permit - fruitless exercise as the harbormaster was nowhere to be found and no one else could help me. Left message apologizing for launching without the sticker and promising to meet up over the weekend (which I did yesterday.

Went to my most hated store (West Marine) for new flares and free Marpol stickers - boat is fully compliant with Coast Guard regulations and ready for inspection.

Installed registration numbers and sticker on bow.

Installed same type of lettering on the transom spelling "Jenny". Its cheesy I know but not having anything was cheesier. Real graphics are coming.

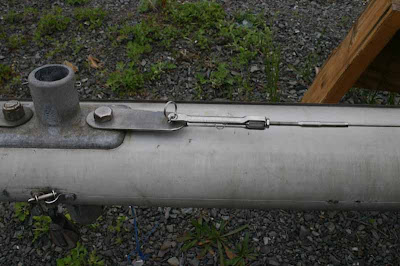
Made a transmission shift lever from a 3 foot piece of 316 stainless bar - it works - that's about all I can say - making it better is high on the priority list.

Unloaded boat of tools and supplies - there were a couple of pickup loads of stuff to haul away. Some of it is piled in the basement. Some is piled in the garage. Some is piled in the boatyard storage shed I rented. Messes everywhere (which is part of today's project)

Dismantle the last of the winter storage structure and haul it home. (now on sawhorses in the yard).

Clean boat - or at least attempted to. It was dark and I could only get the big stuff. There is still a lot more to do.

Load boat with items needed for launch -fenders, docklines and such.


The launch itself was quite painless (other than getting up after four hours of sleep after a long day)

First stop was to buy donuts and coffee for a few guests that were expected. Turns out one of the guests also brought donuts. By noontime, four guests had consumed 19 donuts (my mom ate one too).

At 6:00am sharp the boatyard crew picked up the boat and hauled it to the launch site a mile away. I must say the crew was very quick and efficient.

At the launch site a crane raised the mast. Happily, the new rigging fit just fine.

Then the boat was backed into the Merrimack river. No leaks! The engine fired up immediately. We had time so we let the boat sit on the dock for half an hour or so.

Once we had all got up the courage we cast off the dock lines and motored to the floating dock where Jenny was going to spend the summer. I hadn't actually seen the dock before (I only knew its location when I agreed to rent it) and it turns out there were two docks there. Since it was a nice morning we extended the little cruise up the river a ways until a bridge stopped us. On the way back I called the dockmaster to determine which dock I was on. Unfortunately, of the two docks, Jenny is on the filthiest, dirtiest one. I am terribly under impressed with the whole setup.

First, the cormorants have been enjoying the empty 70x 8 foot dock all spring and it is absolutely covered in guano (bird crap). Secondly, the cleats are of various sizes (some are rediculously small) and suspect attachments. Third, there is a couple of steel projecting bits on the end that are just waiting to gouge out my new paint. For the price, I think the dock should be in better shape. I put in a call to the dock owners yesterday about the metal bits and lack of good cleats. I will wait to see how they respond before bad mouthing them publicly. First impressions are not good however.

We, guests and myself, spent some time sorting out the how to tie up the boat without much in the way of deck hardware. We managed to cobble up something that worked.

I know I mentioned in an earlier blog about these nifty adjusters for the jumper struts.


Well, it turns out they are crap. There is no way to get enough tension in them. One of my guests even volunteered to get hoisted up with some large pliers to tighten them but couldn't get much more. Next year I will have real turnbuckles on the jumper struts.


Those jumpers add quite a bit to the rig and with them under tensioned the mast has quite a bend to it. I guess I am going to look like a racing boat with a highly stressed bent mast this season...


With the boat square away, we motored back to the launch area and dropped off two guests. Then myself and one last guest went back to the dock, tied up, and drifted in 2 knots of current in my little nutshell pram. The pram is great and will actually hold three people in a pinch but the four of us probably add up to something approaching 800 pounds and that is asking an awful lot of a 7 foot 7 inch boat.

Then it was lunch, and back to the boatyard to start cleaning up.

Then it was sleep.

I was beyond being tired.

Friday, I was back to my real job.

Yesterday I spent the morning looking for a dinghy that was small enough to go on the dinghy dock and that had a motor mount for my 5hp Honda motor. I didn't have any luck so I tipped my great grandfather's aluminum skiff that he bought used in the 1960's over from where it had been laying for the past four years, gave it a quick dusting, attached a new registration sticker on it and loaded it in the back of the pickup. I spent about an hour with the Honda motor that I hadn't started in four years either. It started quite easily and ran well after I replaced the fuel that had been sitting in the tank for four years.

Oh, and I found the harbormaster and got squared away there.

Then I went out the boat. Happily, she was right where I left her and floating in just the same place on her lines. First job was scrubbing the guano off the dock. With the first layer removed (I think I am going to rent a gas powered pressure washer next weekend) I rigged some lines around the boat to discourage the birds. They had already started but it wasn't too bad... yet. The manual bilge pump sucked about four or five good strokes of water out of the bilge before it ran dry. That was encouraging. It was raining heavily on Friday and I was worried about taking on water. I bought three more large fenders and rigged them up in a chain that I will just leave permanently on the dock all summer.

I would really like to get those nice terry cloth covers for the fenders. They are expensive but probably worth it. In the meantime, I wrapped my fenders with towels from Kmart (toast covered so at least they are colored tastefully) to help keep my paint looking good. We will see how that all works out. I also wrapped the docklines where they rub on the toerail with strips of terry cloth. Hopefully, I will be able to add the deck hardware soon that will make the strips unnecessary.

With the boat happier, I took the old skiff for a trip up the river to do some exploring. After working to a deadline these past few months, I can't begin to describe how nice it feels to sit back and enjoy life a little. Walking away from the Triton to enjoy a little tour in the skiff felt terribly luxurious.

Looking at the rain this morning and deciding to stay around the house cleaning up was nearly divine.

Life is good again.

Upcoming priorities are to get more deck hardware down (stanchions, lifelines, grabrails, skene chocks at the bow etc.) bend the sails on and attach the sailing hardware, get the head plumbed since it is a hike to the nearest bathroom and maybe rig up an electric bilge pump.

I am not sure about the necessity of the bilge pump. With me being away for a week or more at a time, I am thinking that if I do start leaking, the bilge pump is going to run the battery down long before I get to the boat so it will still sink anyway. I don't think the electric bilge pump helps much in my case. I do have a solar panel for the boat so I might wire it in temporarily or perhaps put it on its own battery with the bilge pump.

And that is the update. Work is probably going to slow down so I can't promise updates as often as they have been coming in the past few months. I need to slow down and engage in outside life again. I still plan on spending time on the boat every weekend but I can't promise that I will have something worth blogging about. Now, its all about having fun and enjoying myself. And reconnecting with people that I have been ignoring in favor of the boat project ;-)

Em Tasol Wantoks.

Thursday, June 18, 2009

Splash


Its been a long two days but the boat was launched without incident at 7:00am this morning. I am too burned out to say much at this point. I would like to thank my friends who showed up for support and to lend a helping hand.


After I get some sleep I will write an update on the last minute projects that kept me up late at night and the synopsis of launch day. Jenny is resting quietly in her natural element by her floating dock in Salisbury on the Merrimac River. Now I worry about all the bad things that could happen while I am not there to check in on her.

More coming this weekend...

Sunday, June 14, 2009

Vroom vroom

The engine runs and runs well now.

That's nice because everything else about the day sucked. I was wet all day.


I should have listened to my gut when I saw an electrical schematic for the electronic ignition module that shows a positive and ground wire connected to the coil. My instinct told me that looked funny. I had never seen that before. But, I figured, I didn't really understand how the electronic module works (I do now) and the schematic must be right.

In the end, I decided that at worse I would fry the electronic module if I changed the wiring. That wasn't so bad since I have a spare now. I simply removed the ground wire and made it look like every other coil I have ever seen. The engine fired off on the first or second revolution and purred like the day I put it to bed four years ago.

I know I took pictures of the instrument panel with the engine running but my camera seems to have removed them :-(

Anyway, the engine ran smoothly and I let it run for about half an hour at different speeds until I felt sure it was going to keep running with no problems. Plus, I simply liked listening to the motor run fter the last few frustrating weeks.

When I finally decided it was time to move on I shut the engine down and pumped out the oil again and filled with more fresh oil. That makes two oil changes since I put in the heavy 'preservative' mix of Marvel Mystery Oil and I think I got the old yucky stuff diluted out enough (you never get all of the oil out of an Atomic Four).

Dropping the oil sump plug into the deep bilge precipitated a thorough bilge hose down. I expect it will take a couple more before the majority of dust/mud is flushed out. I also noticed that a bucket of old used hardware had tipped into the bilge so I guess I will be finding odd bits of hardware in the deep bilge for the next few years too.

With the engine running, it was time to install the propeller. I inserted the shaft through the cutless bearing, assembled the packing gland and slipped the coupling over the end of the shaft. Then I pushed the shaft in to seat the coupling. It was a little sticky so I tapped the shaft with the hammer. I was tapping a bit harder until I remembered destroying my original shaft when I hit it too hard. So I thought I would take it back out and clean up the mating surfaces a bit. Problem was, the coupling was stuck on tight; neither on nor off.

It took me nearly an hour using the socket in the middle trick that someone showed me when I first got the boat and had to pull the shaft.


The long bolts pull the coupling towards the engine. The socket in the middle stops the shaft from coming along. Turning each bolt half a turn at a time will pull the coupling off. It was slow going. At first I used a 9/16 socket and that was a problem because it was a bit too big and that too got stuck in the coupling. In the end it all came apart.

Then I spent half an hour first lightly buffing the shaft and coupling and then actually sanding the shaft and running a drill bit (forstner since that is all I had on hand that big) and a scotch brite pad on the drill motor into the coupling. The two pieces really did not want to go together. Eventually they were persuaded and the whole shebang went back together.

The shaft tube was extended last fall so that I would have more room for the attaching clamps on the hose. That extra length really cut into my working area and it was a bit fussy working with the remaining length.

I had bought some new Gore-tex dripless packing in two sizes to be sure I would have the right size on hand.


Even following the manufacturer's recomendations the packing wound up being too thick. Oh well,what's another $50 of unused material on my basement shelf... I had some plain old flax packing and lots of dripless 'putty' that gets sandwiched between the flax. I tried it the last time I launched and it worked fine so I went ahead and used it again.


The new stuff was supposed to be better but I guess I will have to wait until I decide to order it in the right size. For the record, I have a 7/8 inch shaft and the 5/16 recomended packing size was too big.

I didn't have the wrenches on hand to tighten the gland. Hopefully I will remember to tighten it before I launch. Altogether the shaft took a couple of hours to make happy. So much for dropping the old working parts back in in fifteen minutes.


Thankfully, the propeller didn't put up a fight like the coupler did.


Then I took the first steps towards cleaning up my mess.


You just never know what you are going to need so I was loathe to take anything home. I still am frankly. I would like to sail with a full complement of hardware and supplies but that just isn't going to happen.

While I was straightening up and I was preparing to go home, the sun came out. After the long cold wet day the sun made the day feel young and fresh again.

I stayed around a bit longer and ran my running rigging and tied up the mast in preparation for transport.


I was hoping to take a few days off from work but the boss started shedding tears and mumbling something about being overbooked so it looks like the next day I can work on the boat will be Wednesday the day before launch. That means I am going to be a very busy boy on Wednesday.

On that note, its past my bedtime and I need to get some sleep.

Saturday, June 13, 2009

Marching forward

If that damn engine would fire I would have made good progress. Alas, changing every part in the ignition system didn't change anything. No spark. My thinking now is that something happened when the engine was rewired. Everything checks out fine. I find voltage where I should find voltage and I find ground where I should find ground. Still, I am thinking I may have a bad connection that is just good enough to look good but under a load it fails. I have seen this with old rusty cars.

That last thing I can check -which I thought about on the ride home- is to run a jumper from the negative side of the coil straight to the battery. I already ran a jumper from the positive side of the battery - bypassing every positive power wire in the ignition system - but I didn't think to do that with a ground wire. The only other explanation is that one of the new components I just installed is bad. Highly unlikely but then again I am well past the 'likely' stage.

Other than the engine I made some decent progress today.

I started by glueing up some teak for the blocks that the stern cleats will mount on.


I would have made more progress on the bow mounted hardware except my friendly neighborhood shop that stocks a wide selection of bronze hardware has decided to stop opening for the weekends. That is a bummer.

Luckily my local hardware store had enough stainless hardware to finish my chainplate installation.


With the chainplates all bolted in I could seal them. Unfortunately, I could not get the chainplate covers I wanted in time so I am re-using my old narrow ones for just this season.


I didn't bother with screws since I will be pulling them up within a year anyway. The stern chainplate is of the wide variety that I want on all the chainplates.


With the chainplates in, I decided to continue with the rigging and install the pins that arrived from McMaster and Carr in just over 24 hours from when I ordered them. I found ordering them from McMaster to be much simpler than any marine resource I have used. They had every size of clevis pin and cotter pin that I could want and dead simple to find in their catalog too. They are a great resource.

I just started from the top and worked my way down.


I have no idea what those side tangs were for. No fractionally rigged Triton uses them. The rope is to pull wires through the mast someday.

The forestay and upper stays.


Funny, those struts are under a lot of compression and the only thing they rest on is a cotter pin. Why rigging doesn't fail more often is beyond my comprehension.


I secured the upper stays to the struts with stainless safety wire. I would have liked to have used monel but I could not find my stash and I refused to waste my time going to West Marine. Plus, my work has lots of this stainless wire. Its 'good enough' for one season.


Then I took a look at my roller furler. I will admit I was a little intimidated. More because I just didn't know what to expect. The instructions were good I guess but a little vague.

The first step was to mark the two holes that hold in the top fitting.


Heath from Northeast rigging cut my top foil to length when he made up my rigging order. He actually did a great job and packaged everything I would need and did everything he could to help speed me along - including writing his cell phone number on the box of parts. Too bad he left Northeast rigging. Actually, I have been hearing a lot of negative comments about the company so maybe Heath just didn't fit in.

After using the template to make the marks, I drilled two holes. The holes are what the self tapping screws go through to hold the two piece top fitting in place.


Then I laid out the rest of the foils and ran the forestay up inside them.


Then I just had to join the foils together. This is where the instructions were a little vague. There was a lot of 'tops' and 'fronts' and 'forwards' with no good reference to go from. Eventually, I kept staring at the parts and the logical solution became obvious.


Two plastic halves hook onto the metal joiner piece. A little tab is set in a slot on the joiner piece and the whole assembly is slid into the foil half.


Then 5200 is applied via a syringe into the screw holes and through a filler hole between the screw holes. Channels in the joiner piece allow the 5200 to flow around and fill a cavity sealing and securing the pieces together. The syringe and 5200 (plus the other tools I needed) were included with the installation kit. Thank you Harken.

Once I figured out how to join the foils, I just worked my way down and did them all.

When I got to the bottom I had to slide the halyard swivel and roller drum onto the foil and attach the bottom fitting with a Norseman type mechanical fitting. Funny, I googled for instructions on the fitting and one of the first and best hits came from www.triton381.com site. A fellow Triton owner and inspiration for my own project. You would think Norseman would have their own page with installation instructions but I guess not. Thanks Tim, for posting those instructions with pictures :-)

The norseman took a few minutes to fuss with but I am pretty happy with it. Then I slid the roller drum down and fastened it with the pin.


And then I unpinned it again so that the turnbuckle would be accesible when we step the mast. I think that is a feature riggers like and one reason they recommend this Harken Mk IV Code Zero furler. A quick pull of the pin and the roller drum slides up allowing easy access to the turnbuckle underneath.


And just because I have a tendency to forget important things, I put all the rigging pins in the chainplates so they would be there when its time to step the mast.


The engine was actually the last thing I did today (mast rigging is mandatory for launching - engine is optional since towing is another option) so after some decent progress I got stumped again by the engine. Not a great way to end a productive day.

Oh well, there is always tomorrow...